Welcome to Resourceful Mind! Through my extensive experience in teaching design, engineering, graphics, food and textiles, I've developed resources that make topics easy to understand. My materials include clear visuals, simple explanations, and engaging tasks to reinforce learning and support learners.
Welcome to Resourceful Mind! Through my extensive experience in teaching design, engineering, graphics, food and textiles, I've developed resources that make topics easy to understand. My materials include clear visuals, simple explanations, and engaging tasks to reinforce learning and support learners.
Mock Exam Paper & Mark Scheme
Topic Focus: Design Process, Materials, Sustainability, Ergonomics, Prototyping, Inclusive Design
This mock exam paper has been designed in the style of the official WJEC GCSE Product Design Unit 1 exam. It introduces a contemporary, sustainability-focused product: a foldable laptop stand made from bamboo and recycled aluminium. The paper is fully aligned with GCSE assessment objectives and includes structured sections covering:
The iterative design process
Material selection and manufacturing methods
Prototyping, user needs, and ergonomics
Sustainable product design and disassembly
Branding, batch production, and global supply chain impacts
The exam paper mirrors official past papers in layout and difficulty, with a balance of short-answer, structured, and extended 10-mark questions. The accompanying mark scheme provides clear indicative content and level-based responses for assessment and standardisation.
Suggested Use:
As a full mock exam under timed conditions
For lesson-based walkthroughs and practice sessions
To support revision of AO1–AO4 with real-world product context
For assessment moderation and self/peer marking
Includes:
Printable exam paper
Full mark scheme with indicative answers
Product Design Revision – Key Topics and Practice Questions
Description:
This revision resource supports students in revisiting six key areas of Product Design, each with a clear, student-friendly explanation and a set of tiered questions (Easy, Medium, Hard) to test understanding and encourage deeper thinking. Topics covered include:
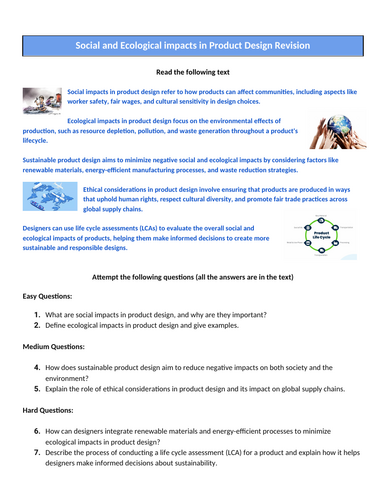
Social and Ecological Impacts
How design choices affect society and the environment.
Smart Materials
Innovative materials that respond to external changes.
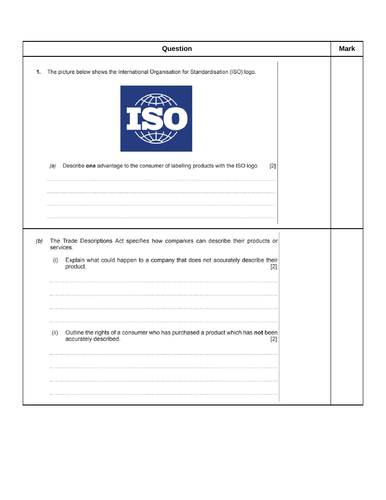
Standards and Legislation
Safety, quality, and legal requirements in product design.
Planned Obsolescence
Why some products are made to have a limited lifespan.
Life Cycle Analysis (LCA)
Evaluating a product’s environmental impact from cradle to grave.
User-Centred Design (UCD)
Designing products that truly meet user needs.
The resource can be used for independent revision, classroom discussion, homework, or formative assessment. It encourages recall, understanding, analysis, and evaluation supporting learners in preparing for written exams or coursework.
Quality Assurance in Manufacturing
Year Group:
Year 10 – Year 11 Product Design
Lesson Length:
1 Hour
Lesson Type:
Independent study Structured learning ( no practical work)
Lesson Aim:
To understand how quality assurance systems help ensure that products are fit for purpose and meet required standards before reaching the customer.
Learning Objectives:
Define the terms quality assurance and quality control
Identify systems used in quality assurance
Describe how these systems are used in real-life manufacturing processes
Understand the difference between proactive and reactive approaches to quality
Lesson Activities Include:
Hook question: “Have you ever bought a product that broke easily?”
→ Encourages reflection and sets up the importance of quality control.
Key Concepts Covered:
Difference between proactive (QA) and reactive (QC)
Definition and purpose of quality assurance systems
Explanation of repair, replacement, and refund processes and their cost to manufacturers
Examples of QA in Action:
Buying materials
Manufacturing components
Material defect checks
Assembly of components
Mind Map Activity:
Pupils complete a diagram identifying quality assurance systems at different stages (ordering, manufacturing, feedback, etc.)
Questions & Learning Checks:
Fill-in-the-blanks
True or false questions
Short written responses
Assessment for Learning:
Pupils answer 5 structured questions to show understanding of QA and QC.
True or false questions used as a quick learning check at the end.
Renewable and Non-Renewable Energy in Product Design
Design and Technology – Product Design
Lesson Length:
1 Hour
Lesson Overview:
This lesson introduces pupils to renewable and non-renewable energy sources and their importance in product design. Pupils explore how different energy sources impact the environment, product function, and consumer appeal. The lesson encourages pupils to make informed design decisions by understanding the advantages and disadvantages of using renewable and non-renewable energy in the development of products.
Learning Objectives:
Understand the differences between renewable and non-renewable energy sources.
Explain how energy sources impact product design decisions.
Explore how renewable energy can be incorporated into product designs.
Learning Outcomes:
All pupils will be able to recall examples of renewable and non-renewable energy sources.
Most pupils will be able to explain the advantages and disadvantages of using renewable and non-renewable energy in product design.
Some pupils will be able to design a concept product that incorporates renewable energy or demonstrates sustainable energy use.
Lesson Includes:
Scaffolding Information:
➤ Clear, student-friendly explanations of renewable and non-renewable energy, their impact on the environment, and their relevance in product design.
➤ Real-life examples of products that use renewable energy sources.
Main Tasks:
➤ Task 1 - Recall
Pupils recall the different energy sources and definition of non renewable and renewable energy
➤ Task 2 - Explain
Advantages & Disadvantages T-Chart: Pupils compare the pros and cons of renewable and non-renewable energy in product design.
➤ Task 3 - Create
Design a Sustainable Product: Pupils design a product powered by renewable energy, sketch it, label its features, and explain how it helps the environment.
Plenary:
➤ Quick review questions to check understanding and consolidate learning.
Supporting Resources:
Visual aids: images of renewable and non-renewable energy sources.
Example annotated product design sketches:
Solar-Powered Garden Light
Wind Turbine-Powered Radio
Solar-Powered Security Camera
Solar-Powered Backpack
Design brief prompt for Task 3
Here is a scheme of learning for a Design and Technology unit that aligns with the principles of the Curriculum for Wales. This Scheme of Learning (SOL) has been carefully crafted to be accessible for delivery by a non-specialist teacher in a general-purpose classroom over the course of a term. It provides a clear outline of the learning objectives, detailing the rationale behind the selected activities. Additionally, the scheme integrates essential skills, encourages critical thinking, and addresses common misconceptions. It includes prerequisite knowledge, comprehensive assessment rubrics, lesson overviews, and a curated list of key vocabulary to support both teaching and learning throughout the unit.
A selection of posters for your DT classroom.
Tools
Plastics
Metals
Wood
Jobs in DT
Famous designers/ engineers
DT vocabulary and Welsh words
All editable
A simple set of design and technology activities that could be used as emergency cover.
15 activities in total suitable for year 7 - year 10
I created these quickly as a teacher called in sick in the morning and needed some activities that students could work through independently without much instruction.
They are not perfect and done in a rush but they did they job!
I created this lesson for a non specialist to cover a DT lesson, can be used as a standalone or over a couple of lessons.
Lesson plan: Draw a living area using a grid and symbols:
Objective: Students will plan and draw a living area layout using a grid system and symbols to represent furniture and objects.
Materials Needed
Grid paper or drawing paper (a pre-drawn grid is available in slides will need to br printed out A3)
Pencils, erasers, rulers
Example floor plan diagrams for reference
Lesson Steps
Introduction (10 minutes)
Introduce the concept of floor planning and how architects and designers use grids and symbols to plan living spaces.
Show examples of floor plans and discuss
Symbols(10 minutes)
Introduce common symbols used in floor plans to represent furniture (e.g., beds, sofas, tables), doors, windows, and other objects (e.g., TV, plants).
Mini review
Grid Basics (10 minutes)
Explain the grid system and how each square on the grid represents a specific measurement (e.g., 1 square = 10cm).
Demonstrate how to measure and mark the grid using rulers and pencils.
Planning Phase (15 minutes)
Assign students to plan their living area layout on the grid paper.
Encourage them to consider scale, proportions, and functionality (e.g., placement of furniture for traffic flow).
Drawing Phase (20 minutes)
Once planning is complete, instruct students to start drawing their floor plan using symbols for furniture and objects.
Emphasize neatness, accuracy in scale, and clear labeling of symbols.
Extension activities
Review and Discussion (10 minutes):
Have students display their floor plans and discuss their design choices with classmates.
Encourage peer feedback on layout effectiveness and creativity.
Reflection (5 minutes):
Ask students to reflect on the challenges faced during the activity and what they learned about floor planning and design principles.
Challenge advanced students to incorporate additional elements such as color codes for different areas (e.g., living room, kitchen).
3 revision activities for GCSE product design covering Social and economic impact in product design, Smart Materials and standards and legislation.
Simple text and easy to hard questions to help them prepare for the exam. Could be printed off and left for cover work as well.
A lesson to guide students on how to answer the exam question on processes and the suitabililty of material used in the process to manufacture the product.
Processes
Materials
Properties
Example questions
I needed a cover Design and Technology lesson that was going to be taught by a Maths teacher so I created this. Hope its useful to someone else as well.
I have compiled a practice exam with answers to aid students in preparing for the WJEC product design and engineering exam. The questions are centered on the fundamental principles and concepts specified in the curriculum. The exam includes questions from the SAMs and previous papers, and I have created an editable document that can be printed and distributed to students.
Providing past papers and mock exams can help students to familiarize themselves with the format and style of the exam, as well as identify areas where they may need further study or practice. Encouraging students to practice with past papers and mock exams can also help to build their confidence and reduce anxiety around the exam.
1 to 2 lessons covering product design laws and legislation
Starter
Easy to follow info slides
5 tasks
Mini reviews
Exit card
2 Stretch 6 mark GCSE Style question activities
One of lesson explaining the effects of emerging technology.
The lesson helps students identify the positive and negative effects and the prepares them for GCSE exam questions.
The lesson contains exam style questions and explains how to access the low and high marks.
Contains
Starter
Main lesson
2 Tasks
Exam question mark breakdown
6 exam questions from 1 - 6 marks
Exit card
Follows on from emerging technology lesson on technology push, market pull and consumer choice.
Revision lesson to cover the surface finishes and treatments that are available to enhance functional and aesthetic qualities in materials.
Mini reviews
Video resources
Past paper questions and knowledge check tasks
Handouts
Introduction to plastics
What are they why we use them
What are their properties
Design a reuseable plastic product
kept it simple for year 7’s being taught by a non specialist. Avoided all the plastic term names like polyethylene etc and tried to make it engaging.
You could add plastic names to stretch higher ability pupils
Useful for that quick lesson you just don’t have the time to create
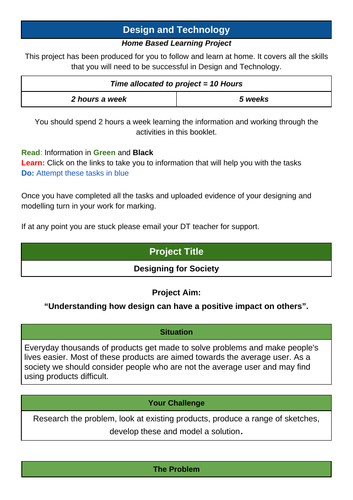
This is a 10 hour project I created for pupils who are isolating or working from home during the Covid pandemic.
The premis of the project is to consider how design can have a positive impact on others. Pupils are expected to complete the project through independent learning were teacher support is not available.
In this project pupils will consider how they can design a product for someone with arthritis. They will look at existing products, carry out some research, create designs on paper and through tinkercad. They will model their designs using home made playdough and create a final pitch.
The project is designed so that their is some guidance on what the pupils need to learn or be able to achieve, links to internet resources to help them complete tasks and upload or provide evidance.
I use Google classroom to provide pupils with their own copy but you may want to adapt if pupils require paper copies.